
This page's structure has been updated on June 2023
It's the weekend now and I just got back from a Chinese New Year party. I always thought of building my own Discord bot and have it in my Discord channel where it's convenient for us to request anything from it. I know there are alot more better Discord bots out there, however I just felt having a bot that is built personally by me. It's like having my own child!
For the finished project you can head over to this github repo.
Prequisites:
- Node.js. Get it here.
- Text Editor (Notepad, Sublime Text, Atom, VSCode or any that you prefer)
- A Discord account. Create one here if you haven't.
- An Imgur account. Create one here if you haven't.
Getting Started:
Create a folder/directory anywhere of your choice & name the project to your liking, for this guide, let's call it discord-bot.
If you are familiar with the terminal on OSX/Ubuntu, go to your preferred location and run the following:
mkdir discord-bot && cd discord-botYou will be brought into the folder/directory.
Next, assuming you have installed Node.js, let's initialize the folder with:
npm initOnce you've answered all the questions, there will be a new file created in your project folder called package.json and inside it will look something like this:
{
  "name": "discord-bot",
  "version": "1.0.0",
  "description": "A discord bot",
  "main": "bot.js",
  "scripts": {
    "test": "echo \"Error: no test specified\" && exit 1"
  },
  "author": "<Your Name Here>",
  "license": "ISC"
}
Get Discord ID & Secret
Before we start coding the bot, let's get the Client_ID & Client_Secret from Discord.
1. Go to the developer's page and click New Application.

2. Name your bot and click Create.
3. You will be directed into a panel where you can see your bot's information. You may fill the description field to your liking. Save the CLIENT ID & CLIENT SECRET as we will be using that.

4. Click Bot on the left panel and click Add Bot. You will be prompt with a message, read it and then click Yes, do it! You will see a message saying *"A wild bot has appeared!" *indicating you've successfully created a bot. Grab the TOKEN and save it with your other secrets to be used later.

Now we have all 3 tokens needed from Discord which are CLIENT ID, CLIENT SECRET & BOT TOKEN. Next we will test the bot in your server. Create a server in Discord.
Once you have your server set up in Discord. Go back to your Developer panel and click OAuth2 on the left panel. Under SCOPES, check bot and copy the URL. Open a new tab and paste the URL.

Add your bot to the server you created and click Authorize.
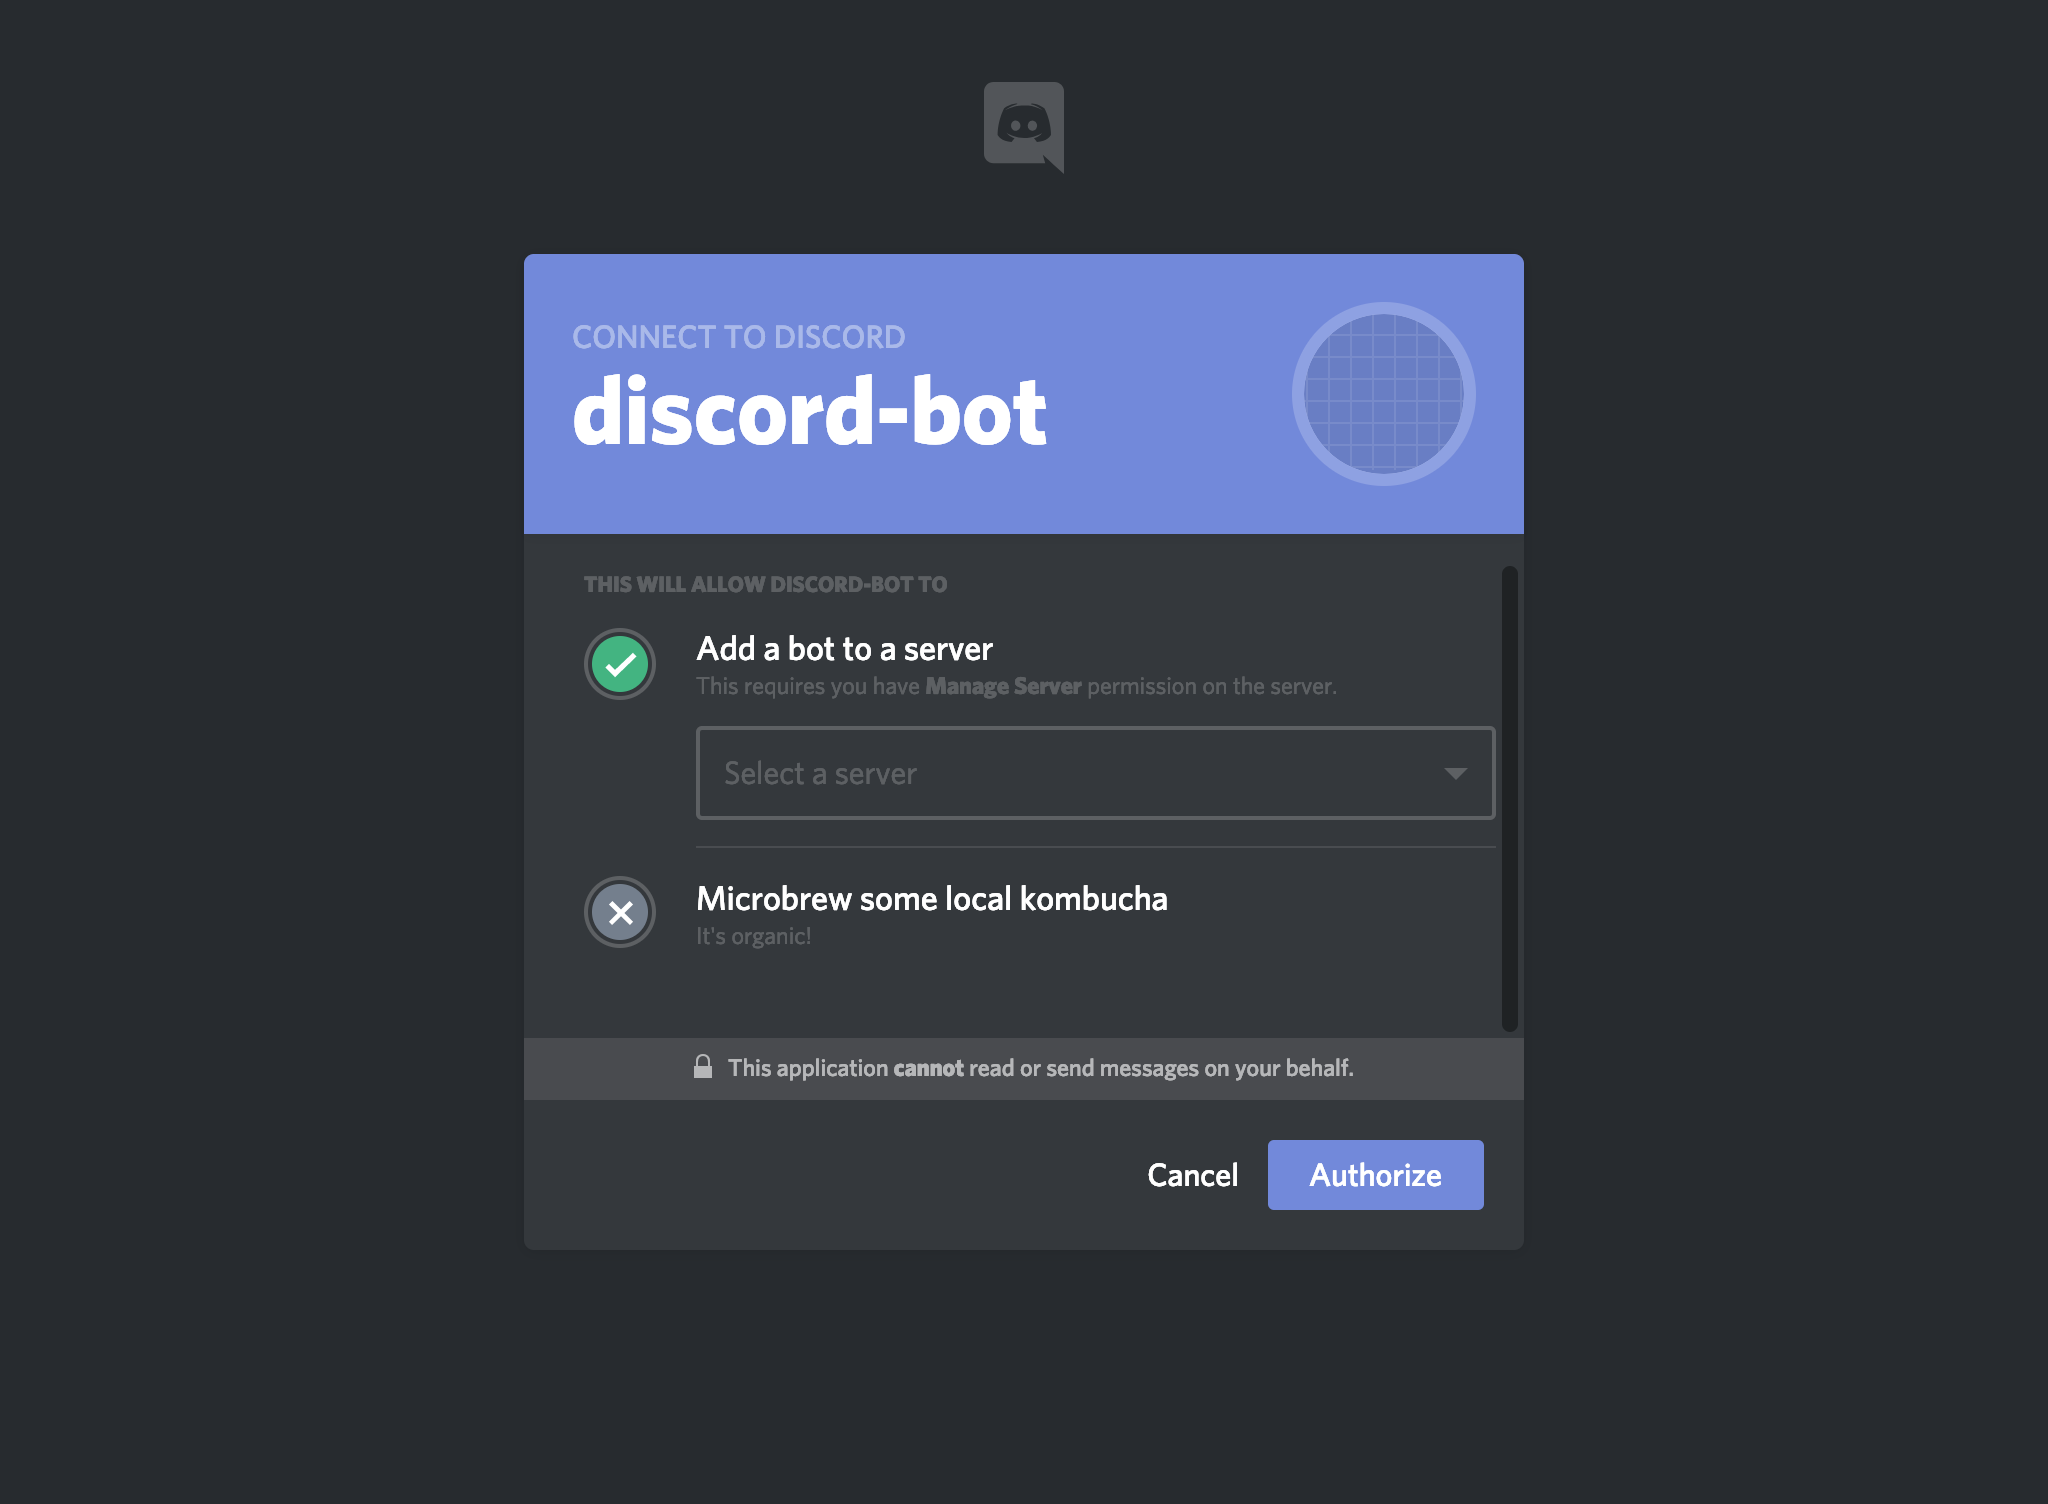
You will see your bot pop into your server.
Setup Imgur API
Next, let's setup a Dev account with Imgur to get hold of our tokens. Head over to Imgur API Docs and follow the guide. You will need Postman to test the API endpoints but don't worry as that will be included in their guide.
By the end, you should get hold of 4 tokens:
- Refresh Token
- Client ID
- Client Secret
- Postman Token
Programming the bot
Assuming you have gotten all tokens needed, let's start building our bot.
Install these packages:
npm i discord.js dotenv node-fetch --saveCreate the following files in your root directory:
.env
DISCORD_CLIENT_ID="<your discord client id>"
DISCORD_SECRET="<your discord secret>"
POSTMAN_TOKEN="<your postman token>"
IMGUR_REFRESH_TOKEN="<your imgur refresh token>"
IMGUR_CLIENT_ID="<your imgur client id>"
IMGUR_CLIENT_SECRET="<your imgur client secret>"
bot.js
require("dotenv").config()
const Discord = require("discord.js")
const fetch = require("node-fetch")

// creates Client instance
const client = new Discord.Client()

client.on("ready", () => {
  console.log(`Logged in as ${client.user.tag}!`)
})

client.on("message", async (msg) => {
  // Sets commands that start with '!'
  if (msg.content.substring(0, 1) == "!") {
    let args = msg.content.substring(1).split(" ")
    let cmd = args[0]
    let q = args[1]

    args = args.splice(1)
    switch (cmd) {
      // !ping
      case "ping":
        msg.reply("pong!")
        break
      case "help":
        const embed = new Discord.RichEmbed({
          title: "Need Help?",
          color: 0xff0000,
          description: "Commands:",
          fields: [
            {
              name: "!ping",
              value:
                "To test bot. Successful test will result in a reply 'pong!"
            },
            {
              name: "!imgur <query>",
              value: "Search for an image on Imgur"
            }
          ]
        })

        msg.channel.send(embed)
        break
      case "imgur":
        // Fetch image from Imgur API
        const options = {
          method: "GET",
          headers: {
            "Postman-Token": process.env.POSTMAN_TOKEN,
            "cache-control": "no-cache",
            Authorization: `Client-ID ${process.env.IMGUR_CLIENT_ID}`
          }
        }

        try {
          const req = await fetch(
            `https://api.imgur.com/3/gallery/search/?q=${q}`,
            options
          )
          const res = await req.json()

          function getRandom(max) {
            return Math.floor(Math.random() * Math.floor(max))
          }

          let _data = res.data[getRandom(res.data.length)]
          let _gif = _data.images[getRandom(_data.images.length)].link
          let parsedGif = new Discord.Attachment(_gif)
          msg.reply(parsedGif)
        } catch (err) {
          console.log("Error occured: ", err)
          msg.channel.send(
            new Discord.RichEmbed({
              title: "Your search returned empty!",
              description: "eg. !imgur <your search>"
            })
          )
        }
    }
  }
})
client.login(process.env.DISCORD_SECRET)
And we're good to go. Let's test it out.
Start your bot from the root directory in the terminal:
node bot.jsYou should see a message in your terminal like this:
battlemachine:discord-bot amin$ node bot.js
Logged in as Discord Bot#XXXX!
Now on your Discord server, type in !ping to test your bot. If all goes well, your bot will reply back with a "Pong!". Here you can see me testing my own bot.

Okay good! Your bot is working, now for the real test, let's request an image from Imgur via your bot. Type !imgur cat and let's see if it will return a picture/video of a cat.

There you have it! The bot replied with a picture of a cat(sorta). You can play around with the code to your liking. I just have it choose a random data from the array and get the picture. So this means everytime you request the same query again, it will always return a different picture of your query.
Congratulations! If everything went well, you have just created your own discord bot that can get images from Imgur! Feel free to add more codes in the future such as linking Youtube API to play video in your Voice Channel. The possibilities are endless!
Do check out the github repo on this. If you feel like contributing any features, send a PR! If you like the project, leave a Star!
